
The pattern links in this tutorial are Affiliate links, I receive a small commission if you purchase a pattern. Thank you, as that helps me pay for this blog! (BTW, I only recommend patterns I really like!)
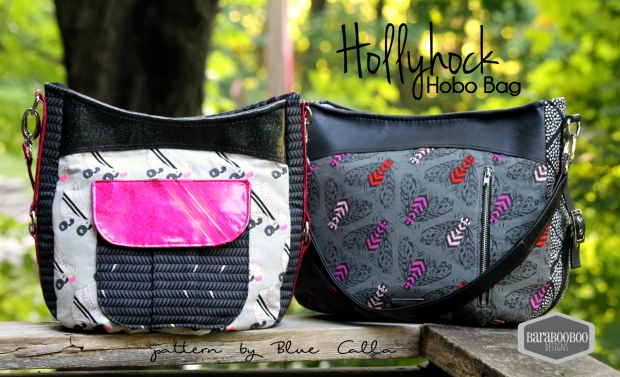
I have just finished testing Blue Calla’s newest pattern called the Hollyhock Hobo Bag. This amazing pattern comes in 2 sizes with loads of details that you can totally customize. The “front” exterior has a vertical zippered pocket and the “back” has an awesome cargo styled flap pocket. The bag gains lots of real estate inside because of the pleated main panels. It comes with instructions for a shoulder strap as well as a Cross Body strap. On the inside, there’s a slip pocket as well as a zippered pocket. You’ll be happy to know that the method for installation of the zipper will make it easy to avoid the “WAVY” zips so commonly seen on Hobo bag curved zipper styles.
As soon as I saw the side panel strap embellishment, I knew I wanted to do one of my tester bags with a Pin Buckle embellishment. That is not in the pattern so that’s why I have written this tutorial. (I did it on my WIDE version of the bag, so please keep that in mind when cutting the strap lengths for the size you choose). This tutorial will require you to purchase the Hollyhock pattern, and you will need to have a some sewing and hardware knowledge. Please keep in mind, I do not profess to be an EXPERT, this is just the way I do it!
First of all you will need to gather some supplies.
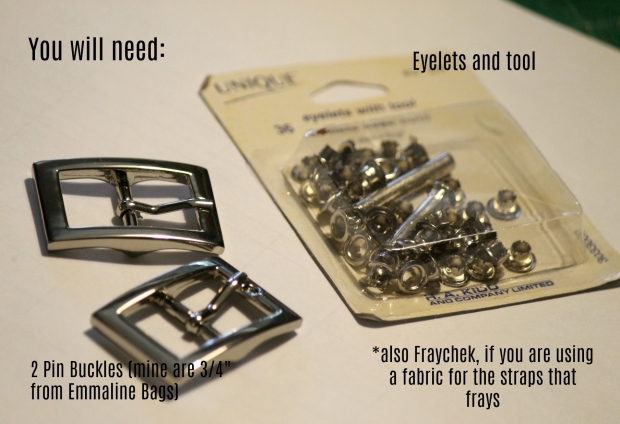
You will need:
2 Pin Buckles, preferably 1″ but 3/4″ is what I could find. I bought these from Emmaline Bags
Eyelets and a tool to install them
Fraycheck if you are using fabric that frays
If possible, 2 D rings that are the same width as your pin buckles. (I used a 3/4″ pin buckle and a 1″ D ring because I had no 3/4″ ones…it’s not the end of the world but I would have preferred both to be 3/4″)
CUTTING:
For the side straps on the WIDE version I cut as follows:
My Top strap piece I cut at 16″ long, you may need to go a bit longer for the TALL version. It was 1.5″ wide (since my buckles were 3/4″….it’s just buckle width X 2 for that measurement). So, if you have 1″ buckles, then cut 2″ wide strap pieces, or if your buckles are 1/2″ then cut 1″ wide strap pieces.
My Bottom strap piece, I cut at 10″ long x 1.5″ wide. (again adjust the strap width for your buckle width, and if you are making the TALL version maybe add an inch to the length.) There will be excess strap that will be trimmed when it’s done.
Construction
Follow step 51 in the pattern to fold and stitch your Bottom Strap piece. (Make sure your stitching down the centre allows enough room for a hole to be cut in the very middle between the stitching lines). Add the Pin Buckle: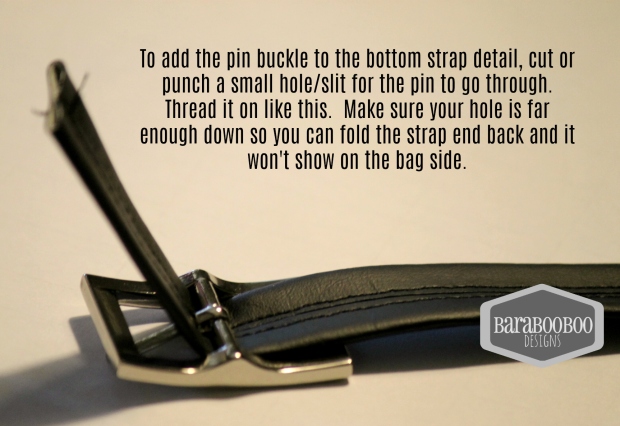
You may need to lengthen your pin hole a bit to ensure your pin can move around freely.
Fold under the end a bit. I added a small dab of glue to hold it in the folded position. Make sure your folded end goes beyond the end of the buckle so later when you stitch down the strap, it will be secured within the stitching.
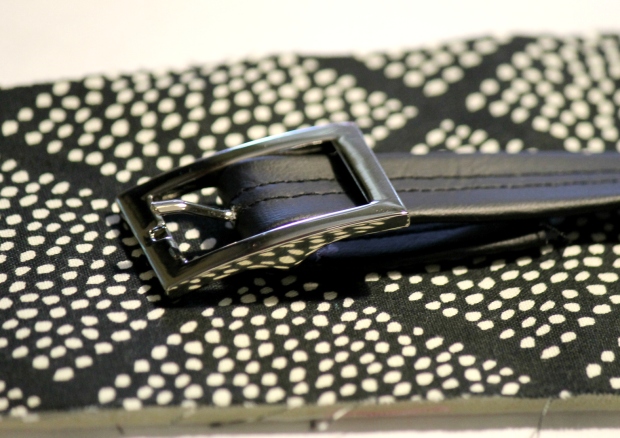
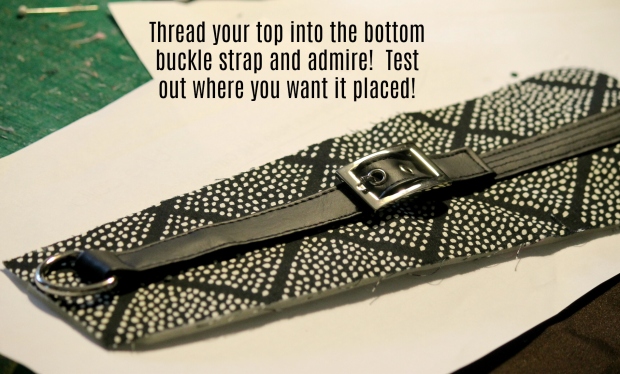
Be sure you have also installed your buckle correctly, it should look something like this…with the pin coming to rest on that small divot in the metal.
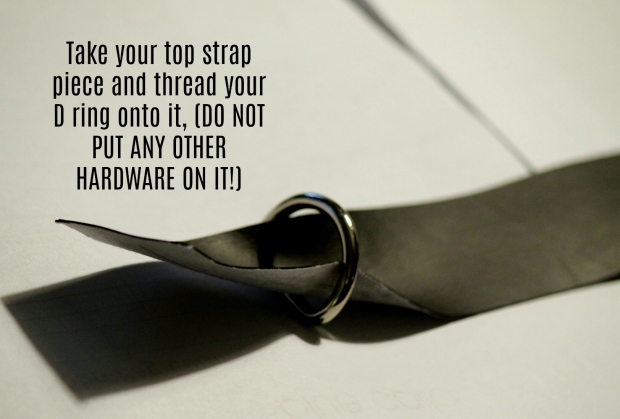
Put that aside, and find your TOP strap piece. Thread your D ring onto it. DO NOT add any other hardware.
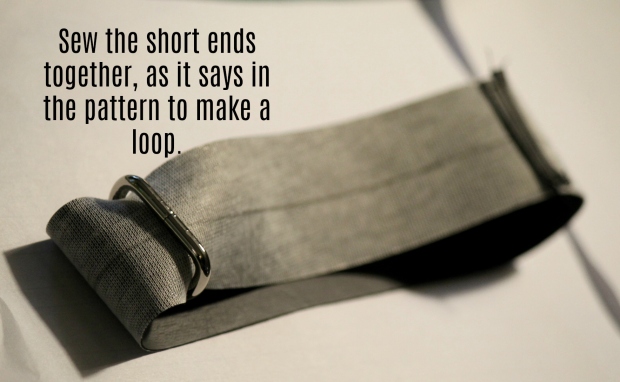
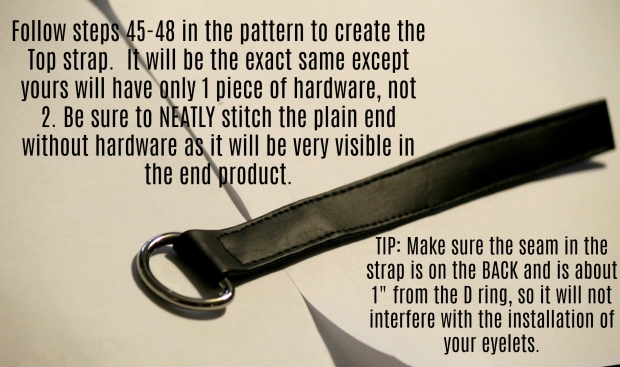
Make your Top Strap piece.
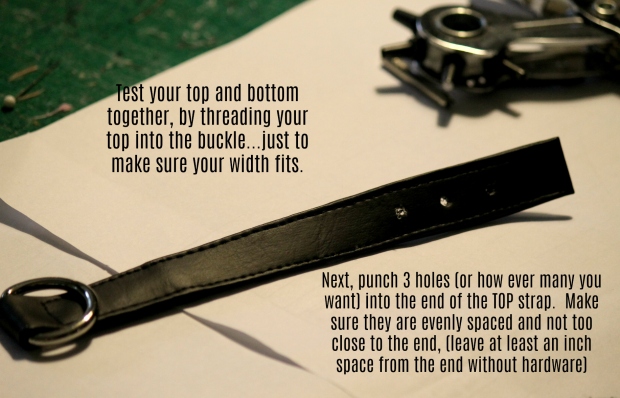
Next, punch your holes. Be sure to use a punch hole size that corresponds to the size of eyelets you will be installing.
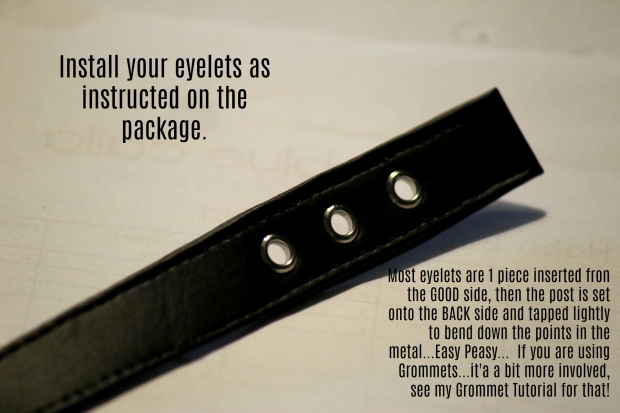
Install your eyelets. (if you have grommets which are generally larger and 2 pieces…then refer to my Grommet Installation post here.)
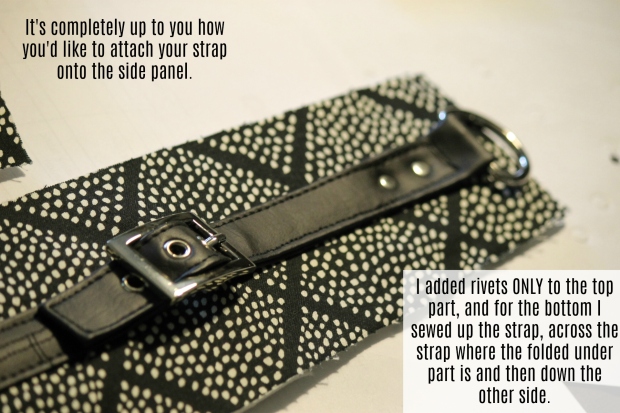
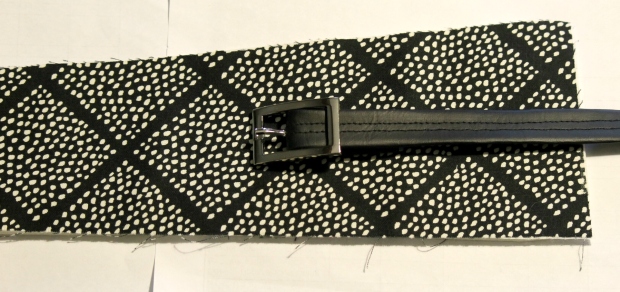
It’s up to you which method you use to attach the straps to the side panel. Just be sure to place the top D ring at the same height as the pattern states because you will need to be able to sew the top edge of the side panel in the final assemby to finish the bag. To make sure my strap didn’t slip I added a small amount of glue to hold it in place as I sewed..Double sided tape works well too… Just make sure it’s only a small amount in the middle area of the strap.
I sewed on the bottom portion making sure to stitch over the folded end, and for the top I used only rivets as I like the top strap part to be loose.

Voila!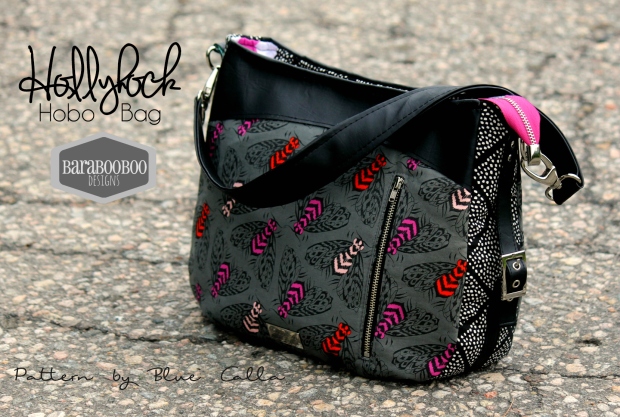

This really is stunning! Thank you for such an excellent tutorial!